
VS Code extension
Plan the work. Watch the agents run it.
Switchyard gives a project one place to plan bugs and features, track checklist progress, and see what coding agents are working on.
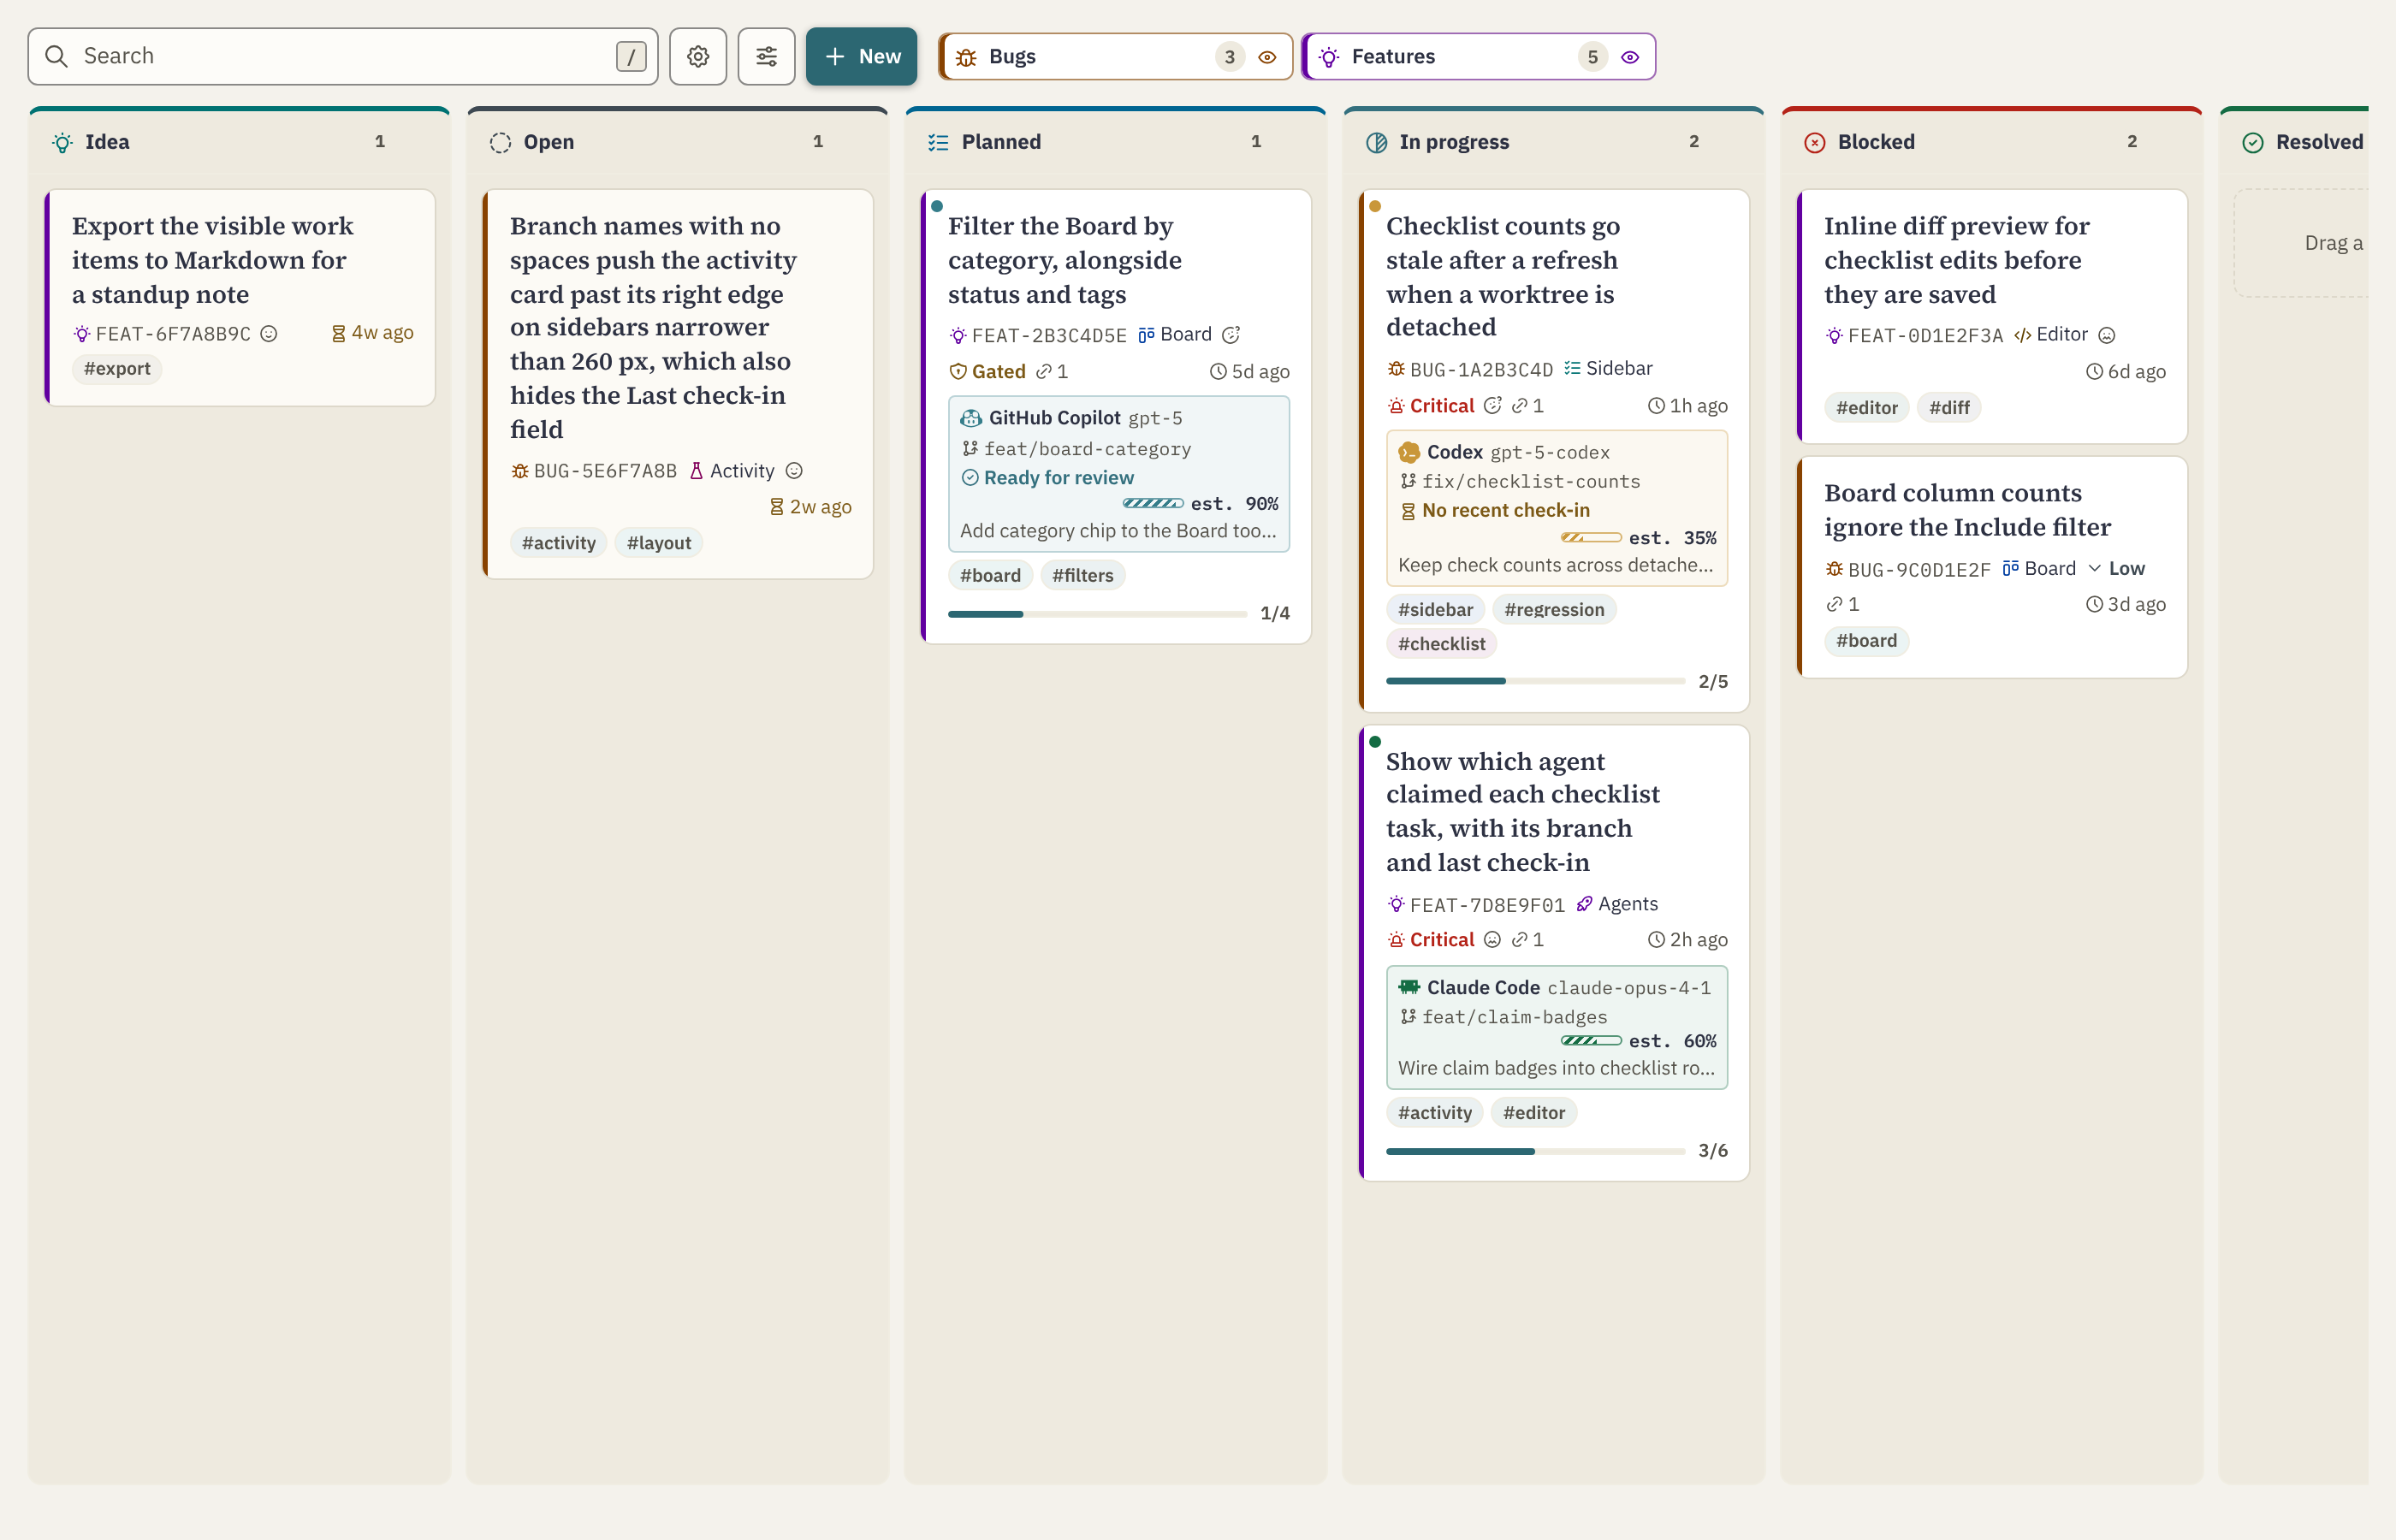
Built for triage and parallel agents
One set of work items for you and for every agent in the repository.
-
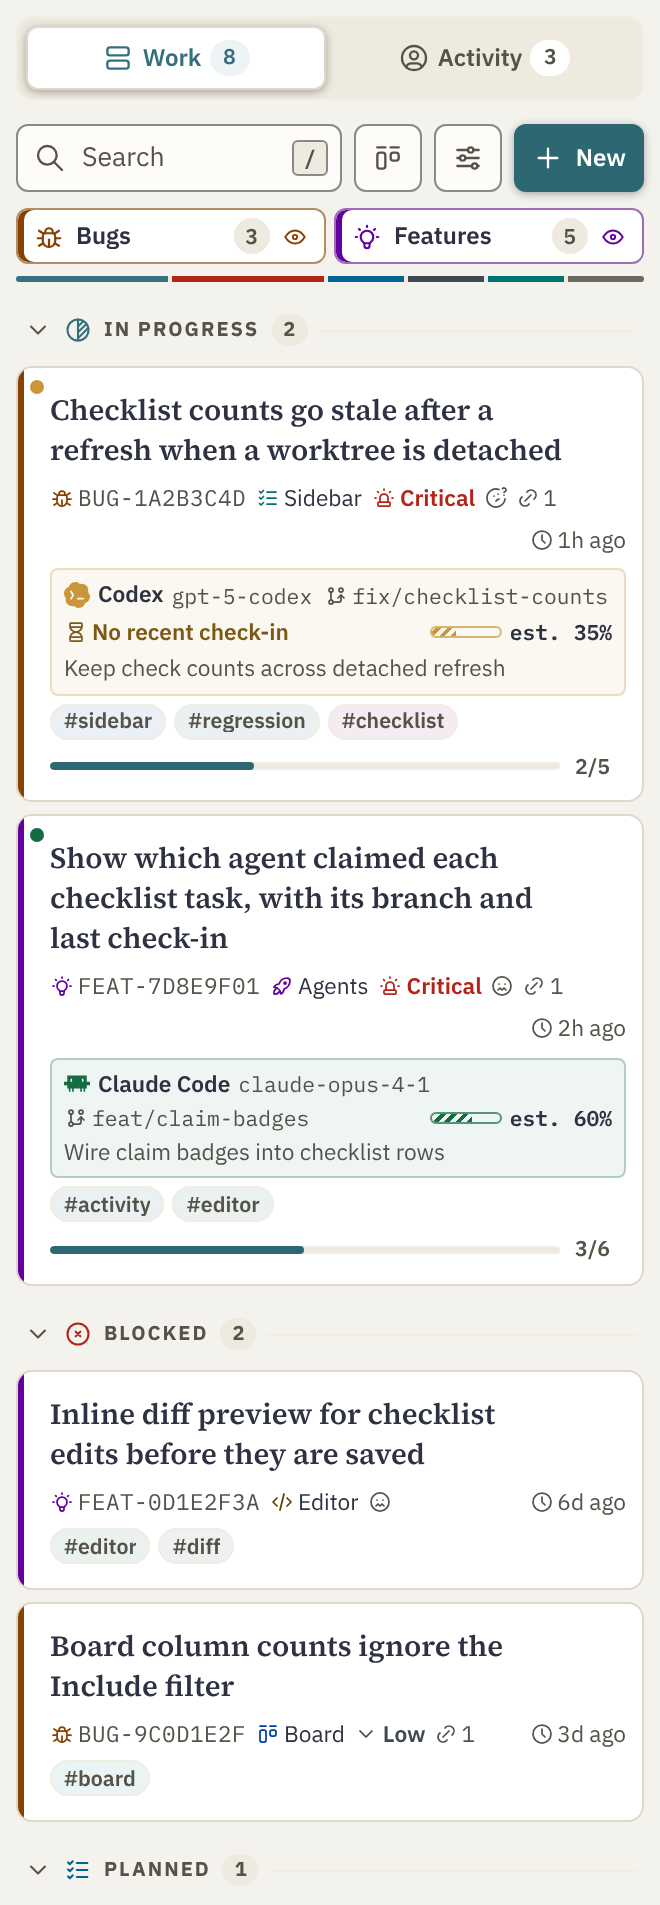
Sidebar Triage
A compact, filterable sidebar. Create a bug or feature, filter the list, and open an item from the same place.
-
Kanban Board
See work by status across columns. Open the Board for a larger view of every item in the project.
-
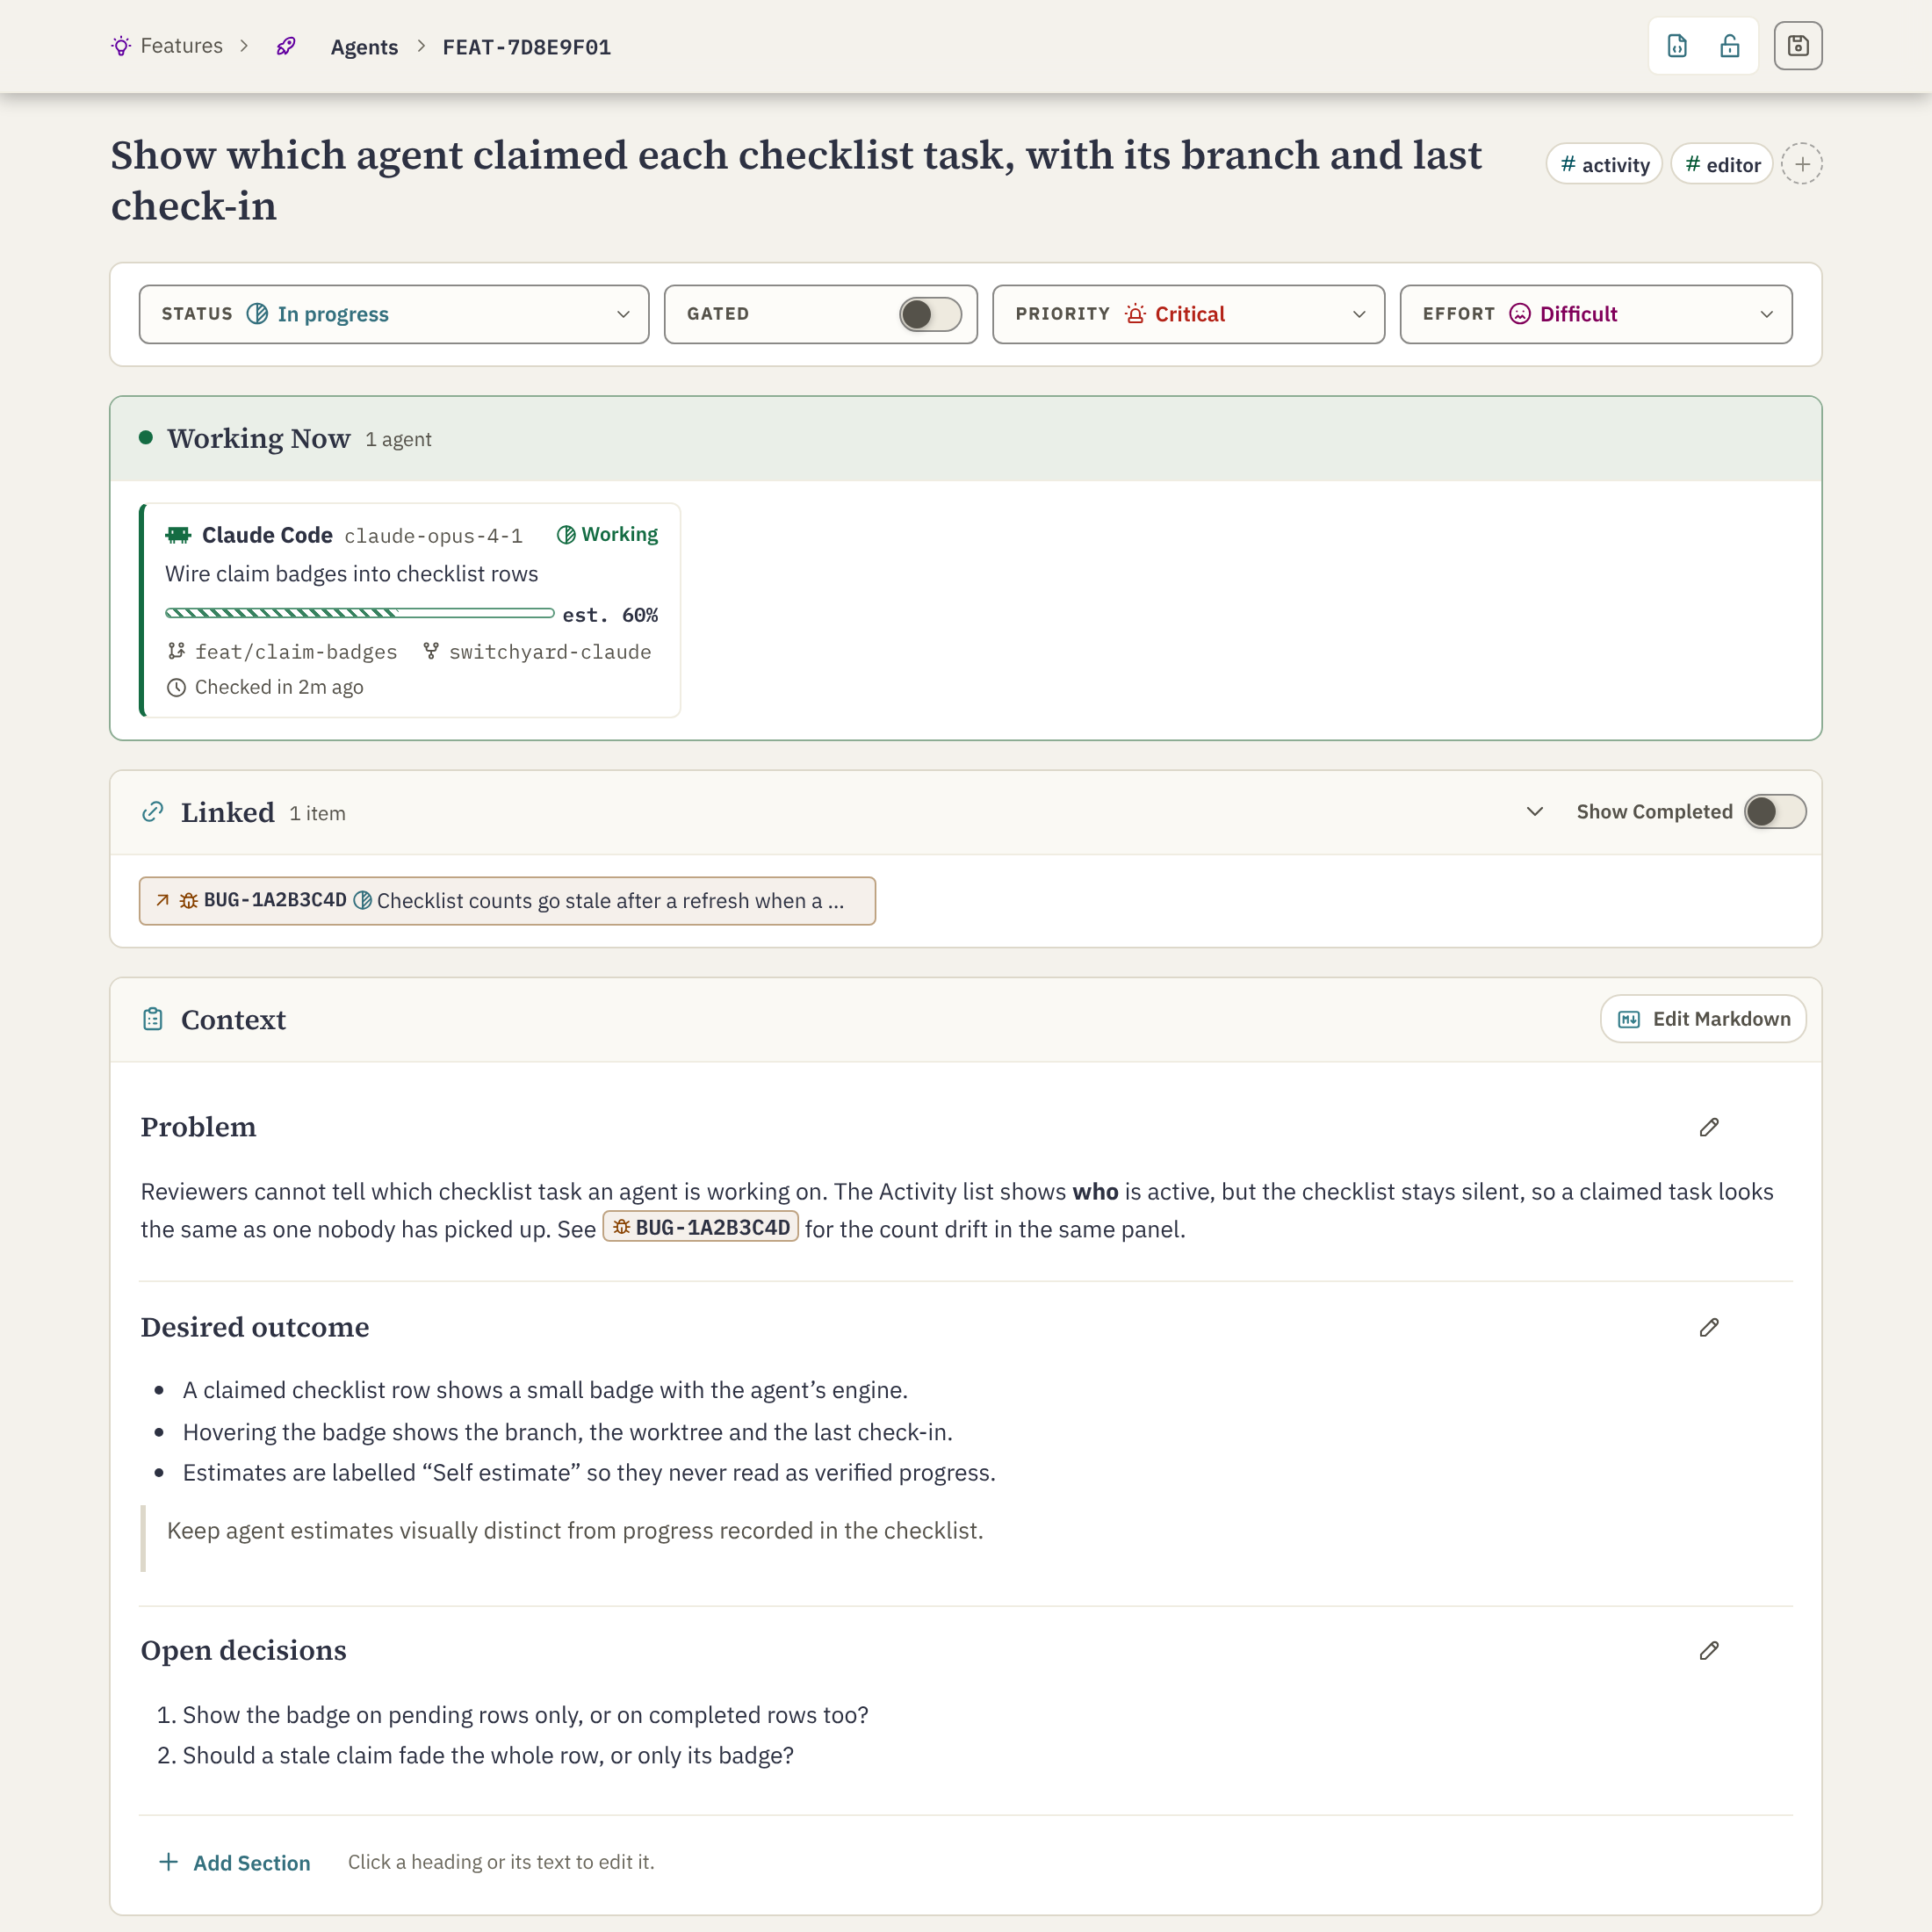
Work Item Editor
Edit context, priority and checklists in one place. Each checked box is saved progress on the item.
-
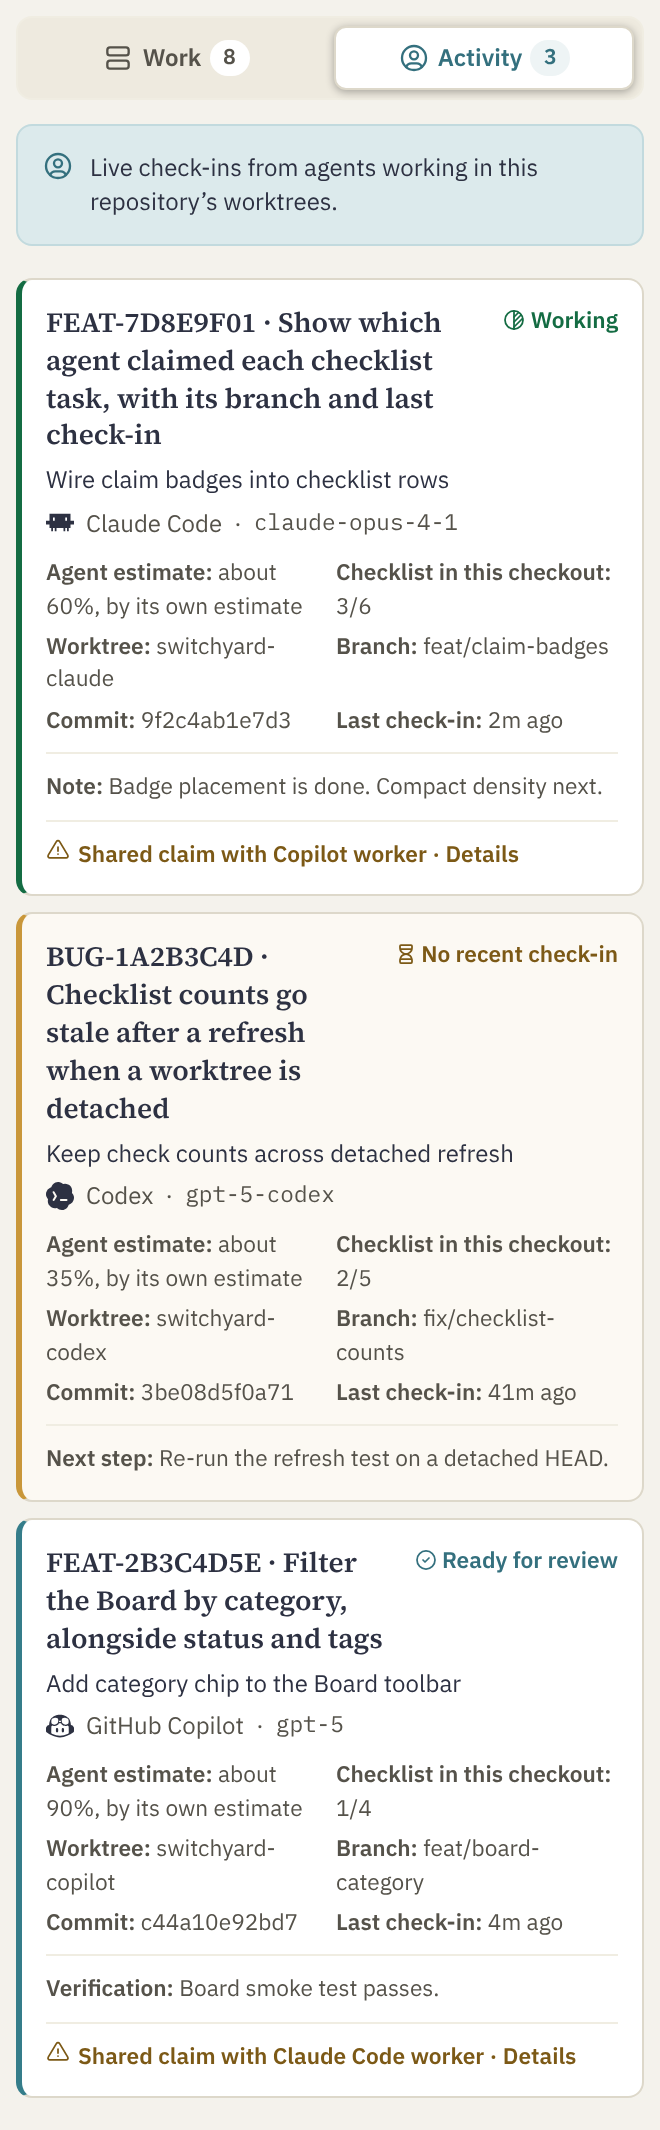
Live Agent Activity
See which agent claimed each item or task, its branch, and when it last checked in.
-
One Registry for Every Agent
GitHub Copilot, Codex and Claude Code read and update the same records through the bundled MCP server.
-
Plain Markdown in Your Repo
Work items are Markdown files under
.vscode/work-items. Commit them and share them with your team.
The views
A calm list for triage, a live view of agent claims, and an editor for the details.
Made to sit beside your code
- Cards get the room
- Grouping, filters and settings fold away. Anything a heading already says is left off the cards.
- Colour means something
- Kind, status, category and live work. A pulsing dot means an agent checked in recently; nothing else moves.
- Fits any sidebar
- Cards adapt from 240 px to a full Board, and six themes include one that takes every colour from your VS Code theme.
Estimates are not progress
An agent’s own estimate is shown hatched and labelled “est.”. The checklist count is the verified figure: it counts the boxes checked in the saved item.
Verified: 3 of 6 tasks checked.
Estimate from the agent. Not checked off.
How It Works
Three steps from an empty folder to agents working on tracked items.
-
Initialize the workspace
In a trusted project folder, run Switchyard: Initialize Workspace. It creates the registry and leaves your other settings and existing items alone.
-
Plan bugs and features
Create a bug or feature from the sidebar. Add context, priority and a checklist of tasks in the editor.
-
Agents claim, check in and release
An agent claims an item or task through MCP, checks in while it works, and releases the claim when it is done. Activity shows each claim.
Plain files in your repository
Each item is one Markdown file. Commit the folder and switchyard-settings.json when the team should share them.
.vscode/
└── work-items/
    ├── bugs/
    │   └── BUG-1A2B3C4D.md
    ├── features/
    │   └── FEAT-7D8E9F01.md
    ├── completed/
└── switchyard-settings.jsonInstall
Install the Switchyard VSIX into VS Code, then initialize a project.
- VS Code 1.105 or newer.
- Node.js 22 or newer, with
nodeon the PATH, to run the MCP server.
-
Install the extension
Run Extensions: Install from VSIX… from the Command Palette and select the Switchyard VSIX. Or, from a terminal:
code --install-extension switchyard-0.1.0.vsix -
Open a trusted project
Open a local project folder. If it already has a
.vscode/work-itemsregistry, Switchyard opens it automatically. -
Initialize the workspace
If there is no registry yet, run Switchyard: Initialize Workspace. It does not change other workspace settings or replace existing work items.
-
Open Switchyard
Select Switchyard in the Activity Bar to create your first bug or feature. Use Switchyard: Open Board for the larger view.
Connect an agent
-
GitHub Copilot in VS Code
Open the initialized workspace and enable Copilot Chat. Switchyard supplies the Switchyard Work Items MCP server and its instructions. In Chat’s tool picker, enable the server’s tools and approve the server if VS Code asks.
-
Codex or Claude Code
Open Switchyard: Settings and use Agent Connections to install the project connection for your client. It writes the entry to
.codex/config.tomlor.mcp.json. Reopen the project in the client and accept its trust prompt if one appears. -
Another MCP client
Register a stdio server with the command
nodeand these arguments. Themcp/folder runs without VS Code.command node arguments "<absolute path to mcp/server.cjs>" --workspace "<absolute path to the project>"
The Codex and Claude Code connections point to your local extension install. Keep them local, or replace the path with one your team has agreed on before you share the repository.